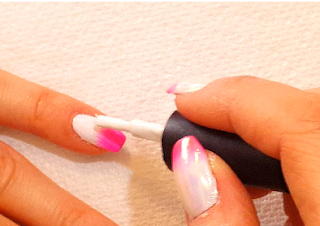
Rose Quartz Nails Using Gel Tutorial

https://sharonnails.blogspot.co.uk/

Rose quartz nails are one of my all time favourite nail designs but I never thought that I would ever be able to create this look myself.  It looked so intricate and I thought it would be so difficult to do.

I watched countless YouTube Videos and I saw that people were using acrylic paints or acrylic but I wanted to use gel.  I am actually allergic to acrylic and so gel is really my only option!


So how did I create these Rose Quartz Nails?


If you would like to see me do this, I have recorded a YouTube Video for my Nail Channel which you can watch using the link below:


Rose Quartz Nails Using Gel - Video Tutorial:


If you would rather read how I created this look then just keep on scrolling - I also leave links to everything I used so that you can recreate this look yourself.  


Step 1 - Prime the nails:

https://sharonnails.blogspot.co.uk/After Prepping the nails (removing the old gel polish, pushing back cuticles and removing dead skin, followed by cleansing with Isopropyl Alcohol) I Primed the nails.

I use Canni Primer on the natural nails.  I already had gel on my nails apart from where they had grown out and so I just put the primer on the new growth.


Step 2 - Sheer Pink Gel Application:


https://sharonnails.blogspot.co.uk/
 Now that the nails are prepped and primed It is time to start layering the gel.  For the pink gel I took this cover gel from Silcare (Base One) and mixed it with clear gel until it looked semi transparent.  


https://sharonnails.blogspot.co.uk/When I was happy with the gel colour, I applied it to all of the nails and left it wet - this is very important! You need the gel to be wet so that you can add in the white gel and it will blend into the pink a little.


It is also very important to keep your pink gel layers thin, I paint it on a little like polish rather than floating it on as if I was creating sculpted gel nails where I would probably only use a couple of layers.  Because you are building the layers up with this technique, your nails can get thick quickly and you don't want to be filing off your carefully created design at the end because you have made your nails too thick.


Step 3: Adding White Gel:


https://sharonnails.blogspot.co.uk/

Now I took a gel brush and made a random swirl with the white into the pink gel that was still wet.  I did this for all of the nails and when I was happy with the first coat, I cured the nails in my UV/LED lamp for one minute.


Step 4: Layer it up!:


https://sharonnails.blogspot.co.uk/

Once your first layer is cured, basically all you need to do is another two or three layers with the white in different places.  So keep layering until you are happy with the look.
https://sharonnails.blogspot.co.uk/


I like to go in with a detail brush for some of the white to give a more random effect and make it look more like rose       quartz.  


Step 5: Final layer:


https://sharonnails.blogspot.co.uk/
When you are happy with the look, you can apply a final layer of the pink gel.  If you have applied the gel thinly then your nails shouldn't look too thick and if they look a little flat, you can always build up your apex with some clear gel before you file.


Step 6: File and Shape:


https://sharonnails.blogspot.co.uk/
 Now your design is complete, you can file and shape your nails.  


I started by using my hand file to tidy up the side walls and free edge of the nails and then I moved on to using my efile.
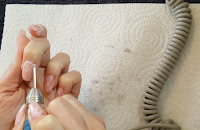
https://sharonnails.blogspot.co.uk/


I used my cuticle bit to remove excess gel around the cuticle area as I find this much easier than using a hand file as I don't cut myself like I do with the hand file!  


https://sharonnails.blogspot.co.uk/

Then I used my ceramic bit to smooth out the surface of the nails without removing too much of the gel, ensuring that my nails had the shape and thickness that I wanted.  

After this, I used a block buffer to make the surface really smooth and ready for the next step.


Step 7: Pink Gel Polish:


https://sharonnails.blogspot.co.uk/


When looking at natural rose quartz I saw that is has a shimmer to it and so that is why I wanted to add a coat of this pink gel polish over the top of my design. 


https://sharonnails.blogspot.co.uk/


 It creates a subtle shimmer with a slight blue tint and really makes the design pop in my opinion.  

I applied one coat and then cured in my UV/LED Lamp for 30 seconds.


Step 8: Top Coat:


https://sharonnails.blogspot.co.uk/

I applied a no wipe top coat to the finished design and then finished with some cuticle oil.


https://sharonnails.blogspot.co.uk/


I am so happy with this design and I know that it is something that I will do again as I found it much easier than I was expecting.


I hope you liked this post and I would love to know if you have tried this design and what method you used, did you find it easy or quite difficult?

I am open to suggestions for future designs, just let me know in the comments what you would like to see.

I am not a professional nail technician and I have not been paid to review the products used in this post, I bought them with my own money and paid full price.

*****************************************

If you are a company and would like me to review products for you, please email me using the contact me page.

*******************************************************

I hope you liked this design and I will see you in the next post!

My Social Media links are below if you would like to follow me, see you next time.....

Don't forget to check out my YouTube Channel and subscribe for future videos!


************** Where I bought these products ******************
*contains affiliate links*

US Links: (I can't find the same pink gel polish in the US but any sheer light pink should work) 


 UK Links:


________________________________________________________________

My Social Media:

Blog: https://sharonnails.blogspot.co.uk/

Instagram: https://www.instagram.com/sharons._nails/

Facebook Page: https://www.facebook.com/Sharons-Nails-1721305611241415/

Pinterest: https://www.pinterest.com/sharonsnails/pins/

twitter: https://twitter.com/sharonsnails

Born Pretty Stamping Plates Haul and Swatches - Part 1

Swatches from Born Pretty Stamping Plates Haul: (Part 1)


https://www.blogger.com/blogger.g?blogID=5076177193142727971#editor/target=post;postID=2544171606592570053;onPublishedMenu=allposts;onClosedMenu=allposts;postNum=0;src=link


So After my first attempt at nail stamping with my big bling clear jelly stamper was a nail fail (see my other blog post here), I was determined not to give up and so I gave it another go.

I waited a good few weeks but finally my Born Pretty Stamping Plates Haul arrived and I managed to do some swatches of some of the images.

If you would like to see these swatches and a few more not shown here, you can watch the YouTube Video by using the link below:

Born Pretty Stamping Plates Haul and Swatches - Part 1 - YouTube Video:


The First plate I used was Born Pretty Stamping Plate BP-73, a small round plate with floral images on it:


The first swatch shown here is where I tried the top middle rose image on a neon pink pop stick and I loved it so much that I think it will be the first image I stamp onto my actual nails (when I finally get around to it!).  I think the black goes really well with the neon pink and the image would be amazing using red and black which I will try next time:

Born Pretty Stamping Plates Haul and Swatches - Part 1


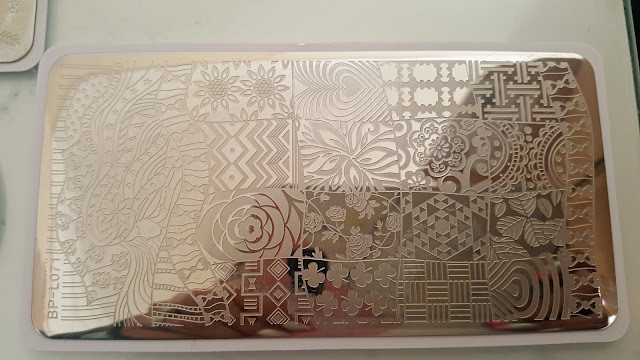
The second image is from this plate - Born Pretty Stamping Plate BP-L071, and the first time I did this it didn't turn out quite right which was my fault as I wasn't picking it up properly.  I did it again and the result was the middle popstick in this above photo. I love the silver stamping polish over the dark purple gel polish on the popstick.

https://amzn.to/2IUxMT6

The final plate I used was Born Pretty Stamping Plate BP-L066.  The first image I swatched from this plate was a small flower on the bottom row and I wanted to try this one as it had a lot more fine detail and would show me how well I was picking up the images.  It worked well the first time but then I needed something to go with it as it looked a little lost all by itself.  I used a little bird image and actually tried it a few times before I got it to work.  I still need practice but I am getting better all the time.  I think the problem with the bird was that I was not scraping the polish completely over the image and I kept mussing its tail off, but I managed to do it right eventually.

https://amzn.to/2ITWG5n


I have to say that for the price of these plates, they are fantastic and the only problems using them was with me not having the right technique yet, but at least I did better than in my previous stamping video!

There will be future posts using these plates and different images and also this was part 1, there will be another video showing swatches from another two plates which came with the haul but I did not manage to swatch yet.

I am not a professional nail technician and I have not been paid to review this product, I bought it with my own money and paid full price.

I am open to suggestions for future reviews, just let me know in the comments what you would like to see.

If you are a company and would like me to review products for you, please email me using the contact page.

I hope you liked these swatches and I will see you in the next post!

My Social Media links are below if you would like to follow me, see you next time.....

Don't forget to check out my YouTube Channel and subscribe for future videos.

************** Where I bought these products ******************
*contains affiliate links*


UK LINKS:
UK supplier of clear jelly stamper: http://www.nail.supplies/bigbling-stamper

     
________________________________________________________________

My Social Media:

YouTube Channel: https://www.youtube.com/channel/UC123XacAlGgNpSE23VWO5tg

Instagram: https://www.instagram.com/sharons._nails/

Facebook Page: https://www.facebook.com/Sharons-Nails-1721305611241415/

Pinterest: https://www.pinterest.com/sharonsnails/pins/

twitter: https://twitter.com/sharonsnails

The Best Cheap UV LED Nail Lamp? Review for SUN 5 48w Hybrid Gel Lamp

What is the best cheap UV LED Nail Lamp?


I think I have found it with this one!


I used to use a 36w UV only lamp and would sit for hours waiting for my gel to cure.  It would take 4 minutes to cure one layer of builder gel and then if I put on a layer that was a little too thick, my nails would get so hot I could have cried.

Now thanks to my new 48W lamp I have gel polish cured fully in 30 seconds, builder gel in two minutes and no heat spikes! I really think it is the best for its price on the market and would not choose anything else, plus the price is amazing for what this lamp can do.

If you would like to watch my full review, I have a video on my YouTube Channel, you can access it here:

The Best Cheap UV LED Nail Lamp? Review for SUN 5 48w Hybrid Gel Lamp - YouTube Video:


There are some amazing features that this lamp has which makes it stand apart from any I have used before.  If you place your hand underneath the lamp, it will automatically begin to cure, and the timer will begin to count up in seconds.  If you need a specific timer setting, you can also do this.  There are buttons for 10 seconds (for flash curing), 30 seconds (for gel polish) and 60 seconds (builder gels and top coats).  The feature I like most though is the 99 second timer which is a low heat mode - this will ensure that you will not get any nasty heat spikes or burning pain when curing your gel as it slowly builds up the heat rather than just blasting out the full 48W all at once. 

Here is the technical information on the box:

Specifications:
 Product Name: UVLED. Nail Lamp
Model: Sun5
Power: 48W
Rated Input: 100-240V 50/60Hz 1A
Dimension: 225mm x 195mm x 110mm

Features:
* No eye discomfort, daylight LED lamps
* Low heat mode to avoid heat spikes and pain when curing gels
* Double light source (365+405nm) LED's to cure UV
Gel/Builder/LED Gel
* 24 strategically placed LED's
* 50,000 Hrs lifetime

I am not a professional nail technician and I have not been paid to review this product, I bought it with my own money and paid full price.

I am open to suggestions for future reviews, just let me know in the comments what you would like to see.

If you are a company and would like me to review products for you, please email me using the contact page.

I hope you liked this review and I will see you in the next post!  My Social Media links are below if you would like to follow me, see you next time.....

****** Where I bought this product ******
 *contains Affiliate Links*

     
________________________________________________________________

My Social Media:

YouTube Channel: https://www.youtube.com/channel/UC123XacAlGgNpSE23VWO5tg

Instagram: https://www.instagram.com/sharons._na...

Facebook Page: https://www.facebook.com/Sharons-Nail...

Pinterest:
https://www.pinterest.com/sharonsnail...

twitter: https://twitter.com/sharonsnails

*********************************************

Stamping Nail Fail with the Clear Jelly Stamper

How not to use the Clear Jelly Stamper and avoid a Nail Fail:

So I tried stamping with the Clear Jelly Stamper and it was a total Nail Fail! 

I have been seeing so many images lately of beautiful nails with amazing designs on them, created by nail stamping.  I tried this a long time ago and wasn’t able to make it work.  However I have seen lots of YouTube tutorials which have introduced me to ‘clear jelly stampers’ and I am hooked!  My old stamper was a hard stamper and I just had to wing it and try to get the image in the position I wanted.  80% of the time it ended up in the wrong place or wonky and in the end I gave up.  The clear jelly stampers have changed all of that, you can see exactly where to place the image and get it in the right place practically every time. 


Although I am raving about the clear jelly stampers I do have to say that whilst it is easy to see through and place your image, it is not so easy to actually put this into practice! I purchased my clear jelly stamper and anxiously awaited its arrival, thinking that once I had my hands on it I would be able to create amazing designs on my nails effortlessly – how naïve I was!

The truth is that my first time using my clear jelly stamper was a complete nail fail.  It was a classic case of ‘all the gear, no idea’ for me as I used the proper stamping polishes and a good stamper (the big bling from original jelly stamper), but when it came to actually picking up the images onto the stamp, I just could not get it right.  The images were not all there or they had been distorted or smudged so that when I placed them onto my pop sticks, they looked wrong. 
I knew that it could not be the tools I was using as I had seen with my own eyes how nail technicians and nail novices did not seem to have this problem.  The problem was obviously with me and I was more than a little frustrated that I couldn’t do it perfectly straight away.

If you would like to see this Nail Fail in real time, you can see it all on my YouTube Channel, click below for the YouTube Video:


Stamping Nail Fail with the Clear Jelly Stamper: YouTube Video:


So after this, I decided that I had better go back to YouTube to find the solution to my problems.

After watching many more videos I realised that I was using not just one wrong technique but many!

Firstly I was leaving the polish on the plate for too long before picking up the image.  I think this is because I am not used to being on a time limit – I can’t actually remember the last time I used regular nail polish, I am so used to using gel polish which obviously does not dry until you cure it in a UV lamp.

Secondly, I was pressing the stamper too hard on the image.  I was advised that only a light touch is needed and it should be picked up with a flick of the wrist rather than just pressing straight down.

My third and final mistake was that I was not cleaning my plate efficiently between pickups.  I was using nail polish remover to clean the polish from the plate after picking up an image with the stamper, but I don’t think I was getting all of it out and there was still a small amount on the plate which was drying onto it and this was why some of the images I was picking up had bits missing from them.

I have taken all of these points on board and I am not giving up this time, I will try again and then in my next stamping post hopefully I will have had more success!


I hope you have enjoyed this Nail Fail with the Clear Jelly Stamper post and I look forward to seeing you next time!

You are welcome to follow me on my Social Media, there are buttons to do this or you can use the links below.

I love trying new products so if you would like me to test products for you, let me know in the comments or if you are a Company wanting me to review your products, please use the contact page to send me an email.

************** Where I bought these products ******************

US and Universal Links (Affiliate Links):


UK supplier of clear jelly stamper: http://www.nail.supplies/bigbling-stamper
(Here you can get the stamper, plates and polishes)
________________________________________________________________

My Social Media:

YouTube Channel: https://www.youtube.com/channel/UC123XacAlGgNpSE23VWO5tg

Instagram: https://www.instagram.com/sharons._nails/

Facebook Page: https://www.facebook.com/Sharons-Nails-1721305611241415/

Pinterest: https://www.pinterest.com/sharonsnails/pins/

twitter: https://twitter.com/sharonsnails

Aurora Unicorn Chrome Gradient Nails Tutorial

How to Create Aurora Unicorn Chrome Gradient Nails:


If you saw my last post you will have seen this design on my nails and I just had to include it in my blog - I also made a YouTube video for this tutorial which you can find below or by going to my YouTube Channel.


Aurora Unicorn Chrome Gradient Nails Tutorial - YouTube Video:


Step by Step Tutorial for Aurora Unicorn Chrome Nails:


Firstly I applied white gel polish to all of my nails.
Then I used my silicone tool to clean up around the edges, removing any gel polish from the skin and cuticle area.
After this, I cure the first coat for 30 seconds in my UV/LED lamp, and then repeat the process so that the polish is opaque.


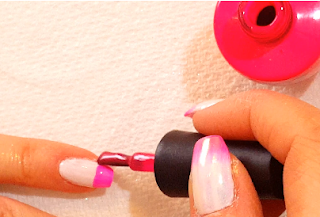
The next step is to apply the neon pink gel polish to the free edge of the nail, leaving it wet.


Next, I used an ombre or gradient brush (link below) to feather the pink upwards, thinning out the harsh line and beginning to form the gradient.  This was my first time using this brush and I thought it was very easy to use, the fine bristles worked much better than a normal flat brush.

When I am happy with it, I cure it for 30 seconds.

After this I repeat the process so that the pink is darker at the free edge and lighter in the middle.  I do not cure this second coat of pink.


Then I apply more white to the top half of the nail and gently use the brush to press the two colours together in the middle, and when I am happy with the result, I cure again for 30 seconds.


I repeat this process for all of the nails and then I apply a no wipe topcoat. I cure this for 30 seconds so that I can use the unicorn chrome powder over the top of the design.


Now it is time to apply the Aurora Unicorn Chrome Powder.  I do this in two stages, firstly I gently rub a small amount over the nail using a makeup sponge. 


Then I really burnish it in with a silicone tool which gives a super smooth finish and high shine.


I cleaned up any excess glitter with a fluffy brush, before applying a final topcoat to seal the finished design.


I like to use a tempered top coat because it gives a high shine and it doesn't work with any pigment powders so there is no risk of ruining my design by accidentally rubbing anything into the topcoat. 

 I learned this the hard way when I had used my bluesky topcoat as my finish coat on some unicorn chrome nails and then the next day I had been swatching a new holographic powder.  To my horror,  the holographic powder went all over my nails and sank in to the topcoat, I was not happy!


I have included links below to the top coats I use - the regular no wipe top coat for rubbing pigments into and the tempered top coat to finished design - speaking of which, here it is!


I hope you liked this tutorial, let me know if you have tried a design like this, and if you liked the YouTube Video, please give it a like and subscribe to my channel for more videos.

Just a little heads up - the next post will be a nail fail post - I tried stamping and let's just say it did not go to plan!

See you next time!

*** Where I bought these products ***

US Links (Affiliate Links):  


UK Links: (Affiliate links)


  ________________________________________________________________

My Social Media:

YouTube Channel: https://www.youtube.com/channel/UC123XacAlGgNpSE23VWO5tg

Instagram: https://www.instagram.com/sharons._nails/

Facebook Page: https://www.facebook.com/Sharons-Nails-1721305611241415/

Pinterest: https://www.pinterest.com/sharonsnails/pins/

Twitter: https://twitter.com/sharonsnails