How to Create Aurora Unicorn Chrome Gradient Nails:
If you saw my last post you will have seen this design on my nails and I just had to include it in my blog - I also made a YouTube video for this tutorial which you can find below or by going to my YouTube Channel.
Aurora Unicorn Chrome Gradient Nails Tutorial - YouTube Video:
Step by Step Tutorial for Aurora Unicorn Chrome Nails:

Firstly I applied white gel polish to all of my nails.
Then I used my silicone tool to clean up around the edges, removing any gel polish from the skin and cuticle area.
After this, I cure the first coat for 30 seconds in my UV/LED lamp, and then repeat the process so that the polish is opaque.

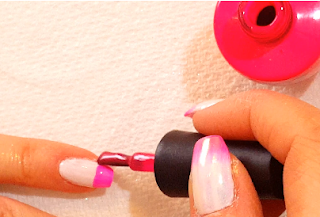
The next step is to apply the neon pink gel polish to the free edge of the nail, leaving it wet.

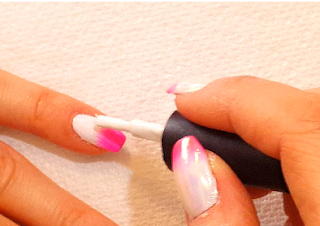
Next, I used an ombre or gradient brush (link below) to feather the pink upwards, thinning out the harsh line and beginning to form the gradient. This was my first time using this brush and I thought it was very easy to use, the fine bristles worked much better than a normal flat brush.
When I am happy with it, I cure it for 30 seconds.
After this I repeat the process so that the pink is darker at the free edge and lighter in the middle. I do not cure this second coat of pink.

Then I apply more white to the top half of the nail and gently use the brush to press the two colours together in the middle, and when I am happy with the result, I cure again for 30 seconds.

I repeat this process for all of the nails and then I apply a no wipe topcoat. I cure this for 30 seconds so that I can use the unicorn chrome powder over the top of the design.
Now it is time to apply the Aurora Unicorn Chrome Powder. I do this in two stages, firstly I gently rub a small amount over the nail using a makeup sponge.
Then I really burnish it in with a silicone tool which gives a super smooth finish and high shine.

I cleaned up any excess glitter with a fluffy brush, before applying a final topcoat to seal the finished design.

I like to use a tempered top coat because it gives a high shine and it doesn't work with any pigment powders so there is no risk of ruining my design by accidentally rubbing anything into the topcoat.
I learned this the hard way when I had used my bluesky topcoat as my finish coat on some unicorn chrome nails and then the next day I had been swatching a new holographic powder. To my horror, the holographic powder went all over my nails and sank in to the topcoat, I was not happy!
I have included links below to the top coats I use - the regular no wipe top coat for rubbing pigments into and the tempered top coat to finished design - speaking of which, here it is!
I hope you liked this tutorial, let me know if you have tried a design like this, and if you liked the YouTube Video, please give it a like and subscribe to my channel for more videos.
Just a little heads up - the next post will be a nail fail post - I tried stamping and let's just say it did not go to plan!
See you next time!
*** Where I bought these products ***
US Links (Affiliate Links):
UK Links: (Affiliate links)
________________________________________________________________
My Social Media:
YouTube Channel: https://www.youtube.com/channel/UC123XacAlGgNpSE23VWO5tg
Instagram: https://www.instagram.com/sharons._nails/
Facebook Page: https://www.facebook.com/Sharons-Nails-1721305611241415/
Pinterest: https://www.pinterest.com/sharonsnails/pins/
Twitter: https://twitter.com/sharonsnails


No comments:
Post a Comment