Swatches from Born Pretty Stamping Plates Haul: (Part 1)
So After my first attempt at nail stamping with my big bling clear jelly stamper was a nail fail (see my other blog post here), I was determined not to give up and so I gave it another go.
I waited a good few weeks but finally my Born Pretty Stamping Plates Haul arrived and I managed to do some swatches of some of the images.
If you would like to see these swatches and a few more not shown here, you can watch the YouTube Video by using the link below:
Born Pretty Stamping Plates Haul and Swatches - Part 1 - YouTube Video:
The First plate I used was Born Pretty Stamping Plate BP-73, a small round plate with floral images on it:
The first swatch shown here is where I tried the top middle rose image on a neon pink pop stick and I loved it so much that I think it will be the first image I stamp onto my actual nails (when I finally get around to it!). I think the black goes really well with the neon pink and the image would be amazing using red and black which I will try next time:
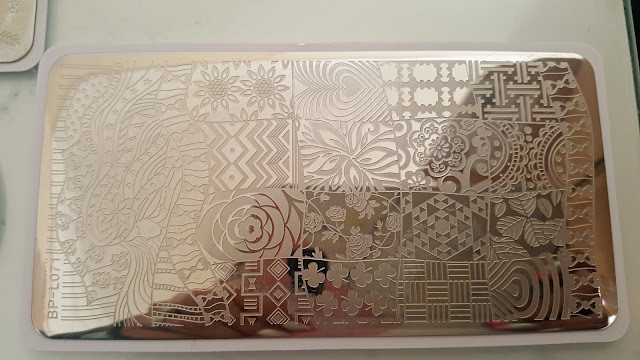
The second image is from this plate - Born Pretty Stamping Plate BP-L071, and the first time I did this it didn't turn out quite right which was my fault as I wasn't picking it up properly. I did it again and the result was the middle popstick in this above photo. I love the silver stamping polish over the dark purple gel polish on the popstick.
The final plate I used was Born Pretty Stamping Plate BP-L066. The first image I swatched from this plate was a small flower on the bottom row and I wanted to try this one as it had a lot more fine detail and would show me how well I was picking up the images. It worked well the first time but then I needed something to go with it as it looked a little lost all by itself. I used a little bird image and actually tried it a few times before I got it to work. I still need practice but I am getting better all the time. I think the problem with the bird was that I was not scraping the polish completely over the image and I kept mussing its tail off, but I managed to do it right eventually.
I have to say that for the price of these plates, they are fantastic and the only problems using them was with me not having the right technique yet, but at least I did better than in my previous stamping video!
There will be future posts using these plates and different images and also this was part 1, there will be another video showing swatches from another two plates which came with the haul but I did not manage to swatch yet.
I am not a professional nail technician and I have not been paid to review this product, I bought it with my own money and paid full price.
I am open to suggestions for future reviews, just let me know in the comments what you would like to see.
If you are a company and would like me to review products for you, please email me using the contact page.
I hope you liked these swatches and I will see you in the next post!
My Social Media links are below if you would like to follow me, see you next time.....
Don't forget to check out my YouTube Channel and subscribe for future videos.
************** Where I bought these products ******************
*contains affiliate links*
UK LINKS:
UK supplier of clear jelly stamper: http://www.nail.supplies/bigbling-stamper
________________________________________________________________
My Social Media:
YouTube Channel: https://www.youtube.com/channel/UC123XacAlGgNpSE23VWO5tg
Instagram: https://www.instagram.com/sharons._nails/
Facebook Page: https://www.facebook.com/Sharons-Nails-1721305611241415/
Pinterest: https://www.pinterest.com/sharonsnails/pins/
twitter: https://twitter.com/sharonsnails


No comments:
Post a Comment