I watched countless YouTube Videos and I saw that people were using acrylic paints or acrylic but I wanted to use gel. I am actually allergic to acrylic and so gel is really my only option!
So how did I create these Rose Quartz Nails?
If you would like to see me do this, I have recorded a YouTube Video for my Nail Channel which you can watch using the link below:
Rose Quartz Nails Using Gel - Video Tutorial:
If you would rather read how I created this look then just keep on scrolling - I also leave links to everything I used so that you can recreate this look yourself.
Step 1 - Prime the nails:
 After Prepping the nails (removing the old gel polish, pushing back cuticles and removing dead skin, followed by cleansing with Isopropyl Alcohol) I Primed the nails.
I use Canni Primer on the natural nails. I already had gel on my nails apart from where they had grown out and so I just put the primer on the new growth.
Step 2 - Sheer Pink Gel Application:
Now that the nails are prepped and primed It is time to start layering the gel. For the pink gel I took this cover gel from Silcare (Base One) and mixed it with clear gel until it looked semi transparent.
 When I was happy with the gel colour, I applied it to all of the nails and left it wet - this is very important! You need the gel to be wet so that you can add in the white gel and it will blend into the pink a little.
It is also very important to keep your pink gel layers thin, I paint it on a little like polish rather than floating it on as if I was creating sculpted gel nails where I would probably only use a couple of layers. Because you are building the layers up with this technique, your nails can get thick quickly and you don't want to be filing off your carefully created design at the end because you have made your nails too thick.
Step 3: Adding White Gel:
Now I took a gel brush and made a random swirl with the white into the pink gel that was still wet. I did this for all of the nails and when I was happy with the first coat, I cured the nails in my UV/LED lamp for one minute.
Step 4: Layer it up!:
Once your first layer is cured, basically all you need to do is another two or three layers with the white in different places. So keep layering until you are happy with the look.

I like to go in with a detail brush for some of the white to give a more random effect and make it look more like rose quartz.
Step 5: Final layer:
When you are happy with the look, you can apply a final layer of the pink gel. If you have applied the gel thinly then your nails shouldn't look too thick and if they look a little flat, you can always build up your apex with some clear gel before you file.
Step 6: File and Shape:
Now your design is complete, you can file and shape your nails.
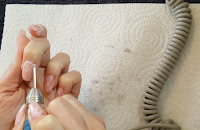
I started by using my hand file to tidy up the side walls and free edge of the nails and then I moved on to using my efile.

I used my cuticle bit to remove excess gel around the cuticle area as I find this much easier than using a hand file as I don't cut myself like I do with the hand file!
Then I used my ceramic bit to smooth out the surface of the nails without removing too much of the gel, ensuring that my nails had the shape and thickness that I wanted.
After this, I used a block buffer to make the surface really smooth and ready for the next step.
Step 7: Pink Gel Polish:
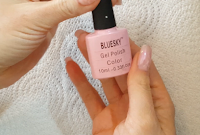
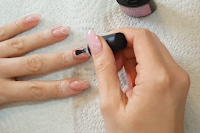
When looking at natural rose quartz I saw that is has a shimmer to it and so that is why I wanted to add a coat of this pink gel polish over the top of my design.

It creates a subtle shimmer with a slight blue tint and really makes the design pop in my opinion.
I applied one coat and then cured in my UV/LED Lamp for 30 seconds.
Step 8: Top Coat:
I applied a no wipe top coat to the finished design and then finished with some cuticle oil.
I am so happy with this design and I know that it is something that I will do again as I found it much easier than I was expecting.
I hope you liked this post and I would love to know if you have tried this design and what method you used, did you find it easy or quite difficult?
I am open to suggestions for future designs, just let me know in the comments what you would like to see.
I am not a professional nail technician and I have not been paid to review the products used in this post, I bought them with my own money and paid full price.
*****************************************
If you are a company and would like me to review products for you, please email me using the contact me page.
*******************************************************
I hope you liked this design and I will see you in the next post!
My Social Media links are below if you would like to follow me, see you next time.....
Don't forget to check out my YouTube Channel and subscribe for future videos!
************** Where I bought these products ******************
*contains affiliate links*
US Links: (I can't find the same pink gel polish in the US but any sheer light pink should work)
UK Links:
________________________________________________________________
My Social Media:
Blog: https://sharonnails.blogspot.co.uk/
Instagram: https://www.instagram.com/sharons._nails/
Facebook Page: https://www.facebook.com/Sharons-Nails-1721305611241415/
Pinterest: https://www.pinterest.com/sharonsnails/pins/
twitter: https://twitter.com/sharonsnails


